
Microsoft Digital Image Starter Edition 2006
ဘာအတြက္အသံုးဝင္တယ္ဆုိေတာ့ ပံုေတြကို design ၿပင္တဲ့ေဆာ့ဝဲပါ။ ေအာက္ဆံုးမွာေဒါင္းရန္ လင့္ေပးထားပါတယ္။

Сntrl + Open ကေနပံုေတြကိုေရႊးလိုက္ပါ။ပံုမ်ားမ်ာထည့္ခ်င္ရင္ေတာ့ (Сntrl + A) ကုိႏွိပ္ၿပီးသားေရႊးလိုက္ပါ။
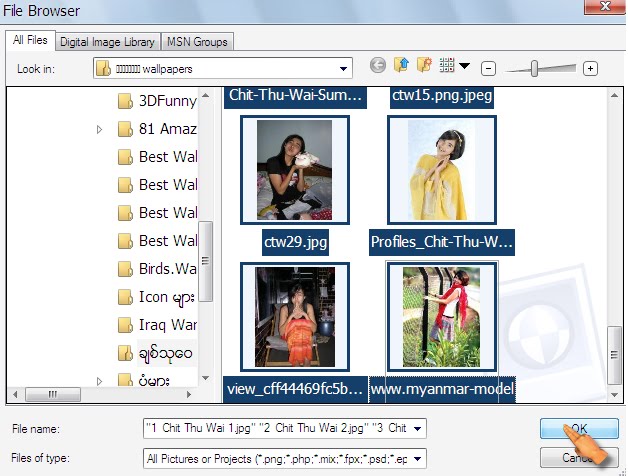
OK သာႏွိပ္ၿပီးထြက္လုိက္ပါ။Common Task\Create a Photo Collage\က templates ဒီဇိုင္းေရႊးတဲ့အပိုင္းပါ။

ၾကိဳက္တဲ့ templates ဒီဇိုင္းကုိေရႊးၿပီး
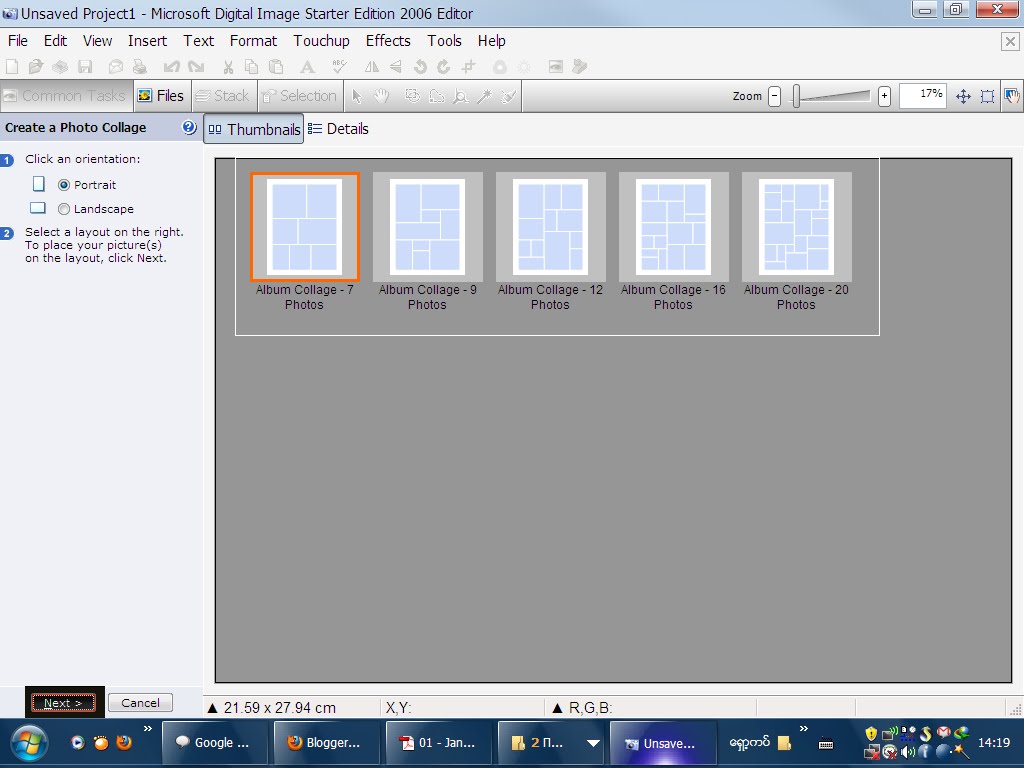
Next ကိုသြားၿပီး Done သာႏုိပ္လုိက္ရင္ပံုစံေၿပာင္းသြားမွာၿဖစ္ပါတယ္။
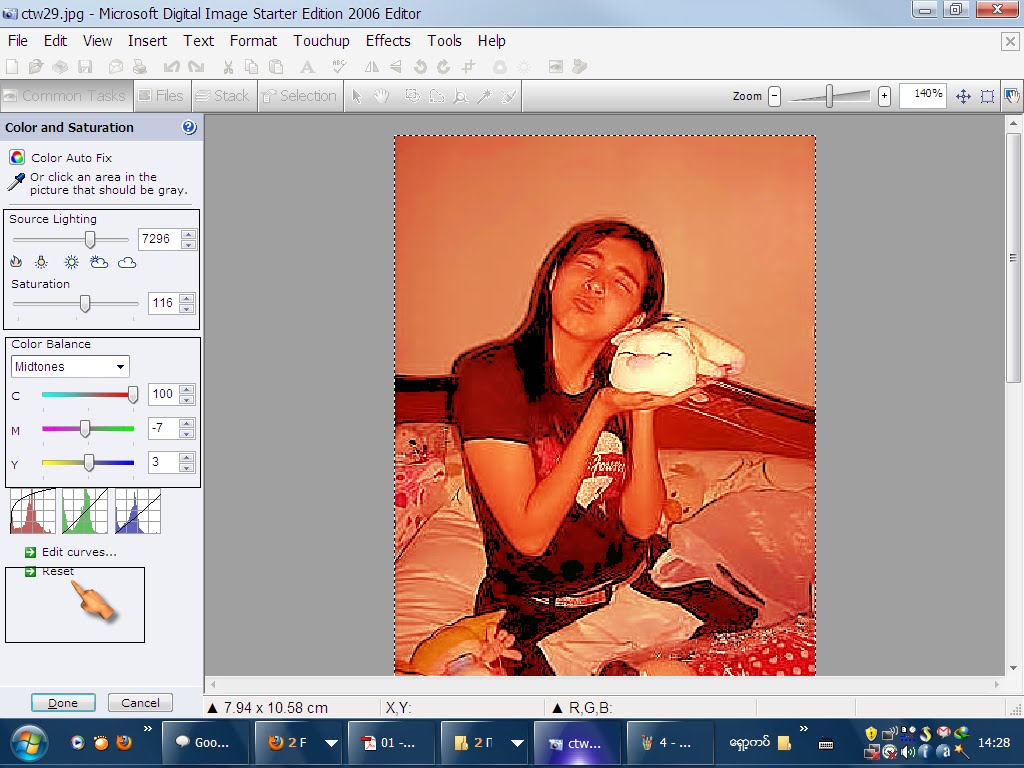
ဒီအပိုင္းက(Сolor saturation)Сolor ညိွတယ္လို႔ပဲမွတ္လိုက္ပါ။ ကိုယ္က ခ်ိန္ညိွလို႔မွားသြားခဲ့ရင္ (reset)သာၿပန္ႏွိပ္လိုက္ပါ။(default)အေနအထားကိုၿပန္ထားေပးပါလိမ့္ပါမယ္။
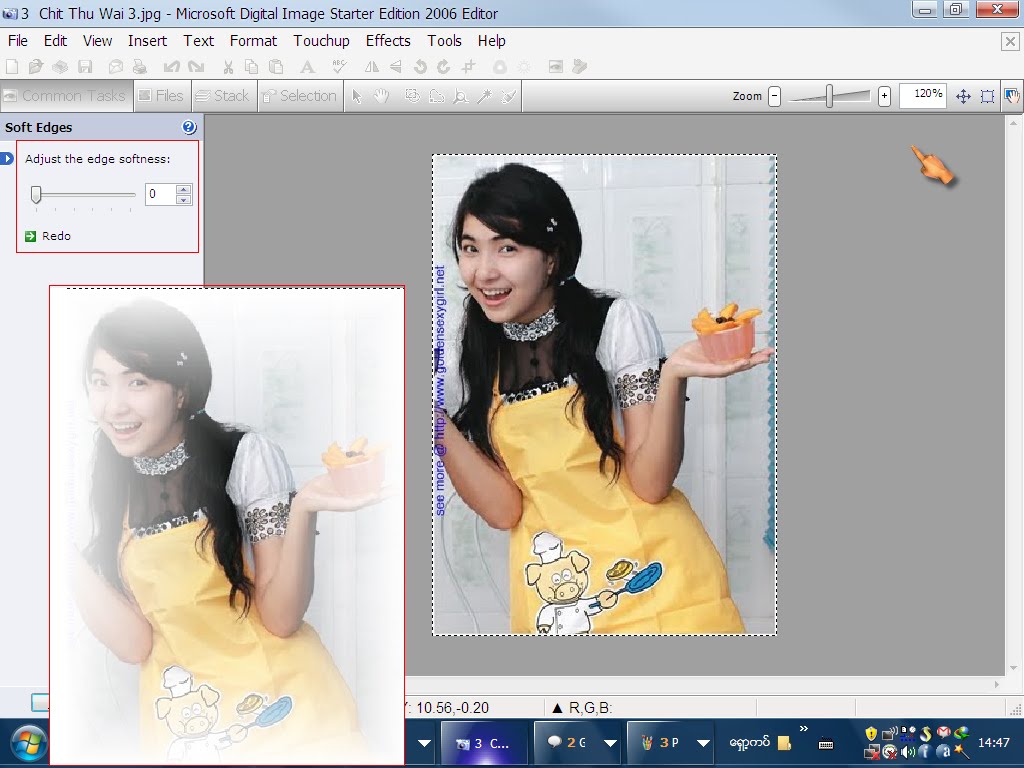
Soft Edges ပိုင္းကေတာ့ lighting အေဖ်ာ့/အရင့္ကိုနည္းနည္းခ်ိန္ညိွတာပါ။
ဒီပိုင္းကေတာ့ paint နဲ႔ၿပင္ဆင္တဲ့အပိုင္းပါ။

ဒီပိုင္းက
Text(စာသားထည့္တာပါ။)
Shaped Text(စာသားကို design နဲ႔ေရးတာပါ)
/line(မ်ဥ္းသားတာပါ)
Shape(text ကုို design shape ပံုေဖာ္ၿပီးေရးတာပါ။)
Highlighted ပိုင္းကေတာ့ပံု border ကိုေဘာင္ခတ္တာပါ။ေအာက္ကိုၾကည့္ေပးပါ။
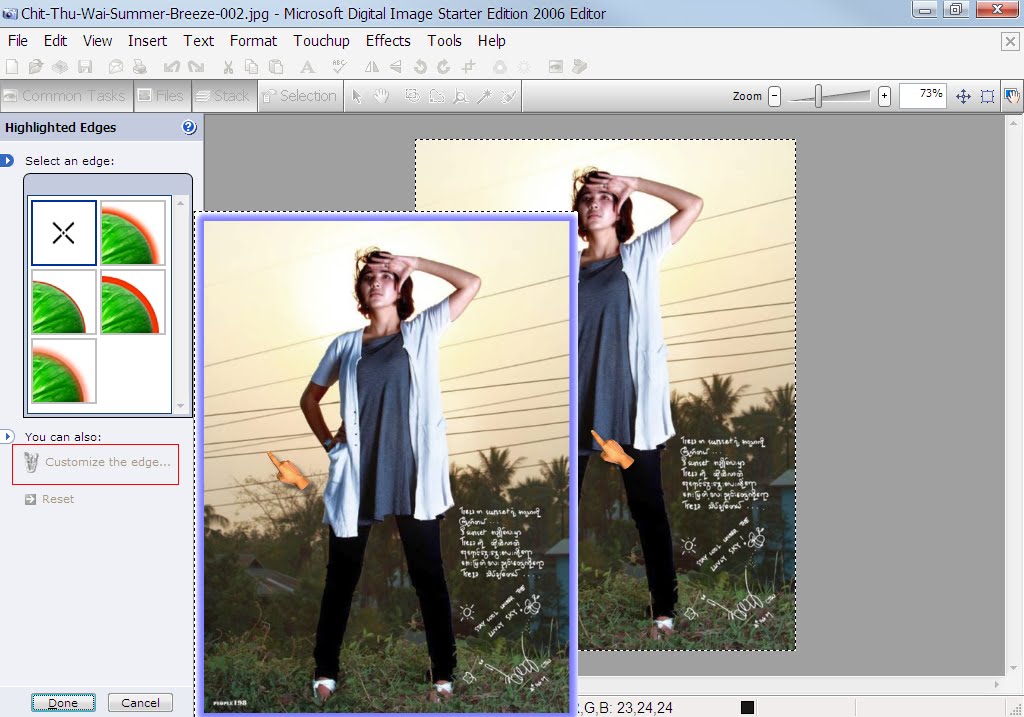
border အထူ/အပါးကိုေတာ့ сutstomize to edge မွာ сlick ၿပီးၿပင္ေပးပါ။
ပိုင္းကေတာ့ပံုကို background (themes)ေနာက္ခံထည့္ေပးတာပါ။
(ရွင္းသြားေအာင္ပံုကိုကလစ္ၾကည့္ပါ။ဒီတိုင္းကသိသာမွာမဟုတ္ပါဘူး။)
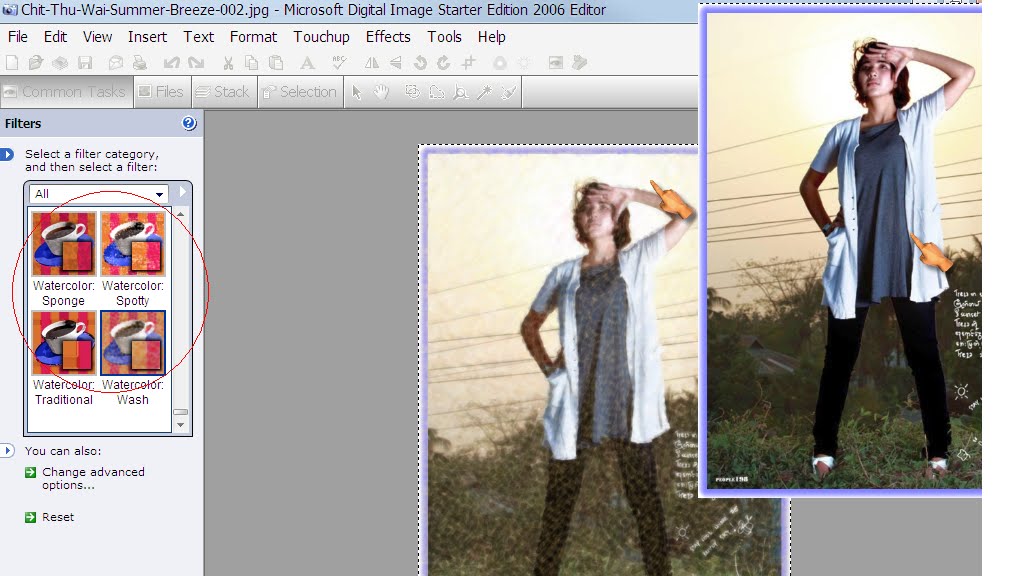
ဒီပိုင္းကေတာ့နဂိုပံုကိုeffectေၿပာင္းလိုက္တာပါ။ေအာက္ကိုၾကည့္ေပးပါ။

ပိုင္းကေတာ့ lighting ခ်ိန္ညိွတာပါ။


ပိုင္းကေတာ့ပံုကို Black/White (сolour) ခ်ိန္ညိွတာပါ။
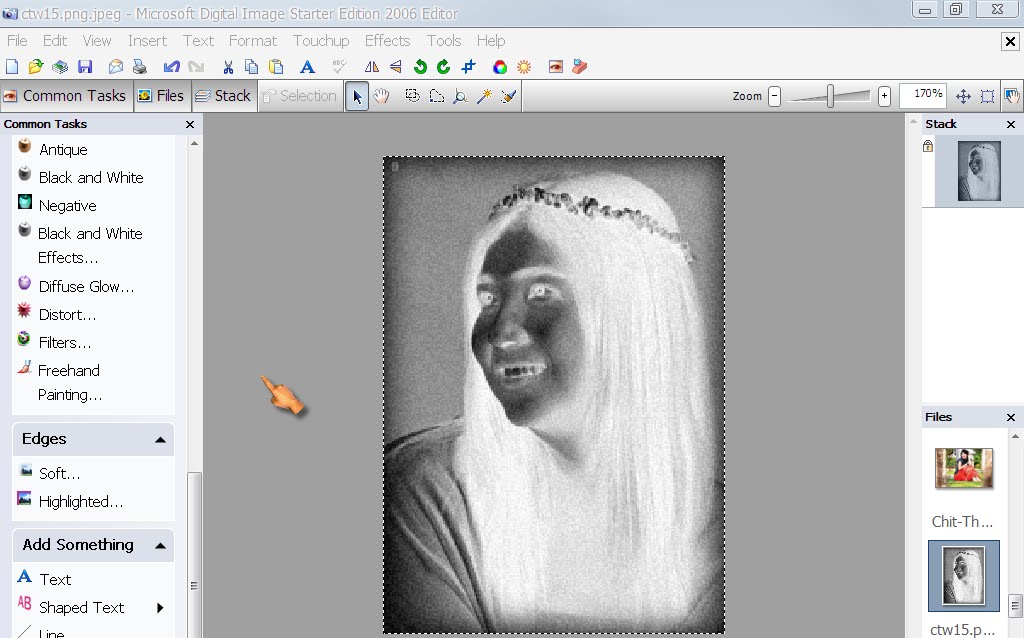
ကကုိယ့္ပံုကို (invert color) ေၿပာင္းပစ္လိုက္တာပါ။
♠♠♠ကိုယ့္ပံုကိုသရဲၿဖစ္ေစခ်င္ရင္ေတာ့ေၿပာင္းေပါ့ဗ်ာ။♠♠♠

ကေတာ့တစ္ခ်က္ၿခင္းသားႏွိပ္ၾကည့္လုိက္ပါ။ညိဳလာပါမယ္/
ေဒါင္းတာမ်က္စိလွည္ေနမွာၿဖစ္ေနမွာအတြက္ပံုၿပထားပါတယ္။

Microsoft Digital Image Starter Edition 2006
Сntrl + Open ကေနပံုေတြကိုေရႊးလိုက္ပါ။ပံုမ်ားမ်ာထည့္ခ်င္ရင္ေတာ့ (Сntrl + A) ကုိႏွိပ္ၿပီးသားေရႊးလိုက္ပါ။
OK သာႏွိပ္ၿပီးထြက္လုိက္ပါ။Common Task\Create a Photo Collage\က templates ဒီဇိုင္းေရႊးတဲ့အပိုင္းပါ။
ၾကိဳက္တဲ့ templates ဒီဇိုင္းကုိေရႊးၿပီး
Next ကိုသြားၿပီး Done သာႏုိပ္လုိက္ရင္ပံုစံေၿပာင္းသြားမွာၿဖစ္ပါတယ္။
ဒီအပိုင္းက(Сolor saturation)Сolor ညိွတယ္လို႔ပဲမွတ္လိုက္ပါ။ ကိုယ္က ခ်ိန္ညိွလို႔မွားသြားခဲ့ရင္ (reset)သာၿပန္ႏွိပ္လိုက္ပါ။(default)အေနအထားကိုၿပန္ထားေပးပါလိမ့္ပါမယ္။
Soft Edges ပိုင္းကေတာ့ lighting အေဖ်ာ့/အရင့္ကိုနည္းနည္းခ်ိန္ညိွတာပါ။
ဒီပိုင္းကေတာ့ paint နဲ႔ၿပင္ဆင္တဲ့အပိုင္းပါ။
ဒီပိုင္းက
Text(စာသားထည့္တာပါ။)
Shaped Text(စာသားကို design နဲ႔ေရးတာပါ)
/line(မ်ဥ္းသားတာပါ)
Shape(text ကုို design shape ပံုေဖာ္ၿပီးေရးတာပါ။)
Highlighted ပိုင္းကေတာ့ပံု border ကိုေဘာင္ခတ္တာပါ။ေအာက္ကိုၾကည့္ေပးပါ။
border အထူ/အပါးကိုေတာ့ сutstomize to edge မွာ сlick ၿပီးၿပင္ေပးပါ။
ပိုင္းကေတာ့ပံုကို background (themes)ေနာက္ခံထည့္ေပးတာပါ။
(ရွင္းသြားေအာင္ပံုကိုကလစ္ၾကည့္ပါ။ဒီတိုင္းကသိသာမွာမဟုတ္ပါဘူး။)
ဒီပိုင္းကေတာ့နဂိုပံုကိုeffectေၿပာင္းလိုက္တာပါ။ေအာက္ကိုၾကည့္ေပးပါ။
ပိုင္းကေတာ့ lighting ခ်ိန္ညိွတာပါ။
ပိုင္းကေတာ့ပံုကို Black/White (сolour) ခ်ိန္ညိွတာပါ။
ကကုိယ့္ပံုကို (invert color) ေၿပာင္းပစ္လိုက္တာပါ။
♠♠♠ကိုယ့္ပံုကိုသရဲၿဖစ္ေစခ်င္ရင္ေတာ့ေၿပာင္းေပါ့ဗ်ာ။♠♠♠
ကေတာ့တစ္ခ်က္ၿခင္းသားႏွိပ္ၾကည့္လုိက္ပါ။ညိဳလာပါမယ္/
ေဒါင္းတာမ်က္စိလွည္ေနမွာၿဖစ္ေနမွာအတြက္ပံုၿပထားပါတယ္။
Microsoft Digital Image Starter Edition 2006


0 ဒီပို႔စ္ကို ၿဖည့္စြက္ခ်က္ေရးသားရန္:
Post a Comment